Showing posts with label Tutorial. Show all posts

Pattern Making

Today I thought I'd share how I make my patterns for felt items and embroidery.


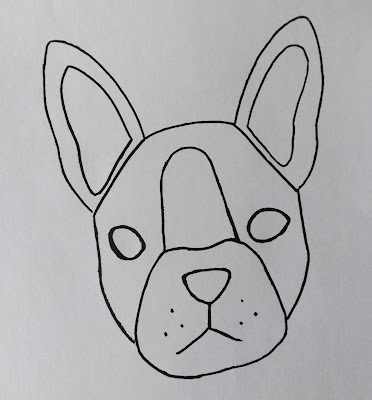
I usually start sketching using any notepad and pen that is closest to hand. (please excuse my drawing .. I'm no artist by any means). This one was done while looking at photos of Boston Terriers on the computer. 


I then scan this in to the pc and if I want to make to image larger or smaller I do this in Photoshop.


These are the original and re-sized versions.


As the outlines on the original were very sketchy and drawn using a Biro the larger copy looks quite faint so I draw around the outlines using a black fine-liner or Sharpie.


After going around the image with a pen, this copy is scanned then tidied up in Photoshop. It is then from this image that I make any templates for patterns or use for embroidery.
It seems like a bit of a long winded process but it actually doesn't take too much time to do.


Doily Dream Catcher


I started to make this dream catcher quite a while ago after the outer ring of one of my embroidery hoops broke. The attachment for the screw completely split away from the wood but I kept the inner ring in case I could find a use for it. I'd seen lots of dream catchers on Pinterest using lace or doilies in the centre so I thought I'd try to make my own. 


 I gathered up some scraps of lace and ribbons,some fabric to cover the hoop and a doily ( I crocheted mine as I could not find one the right size to fit the hoop )


I cut some fabric in to strips, mine measured a little over an inch, and began to wrap around the hoop. The ends and any fabric joins were secured using a hot glue gun. During the wrapping my fabric began to fray slightly so I snipped off the threads.


Using crochet cotton I weaved through the edge of the doily and around the hoop. When I reached the end tied the cotton in a knot.


I then threaded the oddments of ribbon and lace through the bottom of the hoop. I also crocheted some chains, threading beads randomly as I went along and added some small tassels to the ends.
All finished.

Fabric Test and Tutorials

I was kindly asked by Cat from Cut Out And Keep if I would like to test out some fabric and write a tutorial for the site and of course I jumped at the chance.
The fabric was supplied by Premier Prints, Inc. The site stocks so many beautiful fabrics if was difficult to decide.


I finally settled on these two designs, Bird Silhouette and Air Traffic and used them to made some cushion covers.


On the bird silhouette cushion I embroidered some wording using chain stitch


and appliqued felt letters on to the air traffic one.
Both the tutorials for these can be found on Cut Out And Keep, here and here.